Creative Commons
To source the various components of my scenes and build my own assets, I made use of Creative Commons to find royalty free images which I could adapt and transform for my project. To achieve the walls of the first scene, I layered some textures sourced from Creative Commons over my basic shapes and played around with the saturation till I achieved a rustic log cabin atheistic. When creating the fireplace I took elements from existing images and layered a brick texture on top, adjusting the skew and perspective to give it greater dimension.
Lighting & Shadows
When creating my scenes, I wanted to make sure I had a good understanding of different lighting conditions and how these can affect an object’s shadows.
Generally, the smaller the light source, the harder the shadow will appear, the larger the light source, the smaller the shadow will appear (McKenzie and Overturf, 2009). Moreover, the direction of shadows and where the highlights appear on an object are indicators of directional lighting (McKenzie and Overturf, 2009).
Hard Light/Hard Shadows:
- Bright sunny days produce high contrast images.
- Shadows created have clearly defined edges (hard shadow).
Soft Light/Soft Shadow
- Light produced on an overcast day is low contrast.
- When light rays are scattered they hit the object from different angles, resulting in a soft shadows.
Taking these basic principles into consideration, when constructing my scenes, I made sure to keep in mind the lighting of the scene, so I could adjust the shadow strength and shape if needed. For example, when the plane in the toy shop window flew across the composition, I knew to increase the shadow size as the object got closer to the light source. Moreover, when I placed the stockings around the fireplace in the first scene, I added a subtle warm glow around their edges to replicate the reflection of light from the fireplace.
Animations
With each of the three scenes, I wanted to combine a mixture of stationary and animated objects. Below, I have briefly outlined the process of animating the various elements that made up each scene.
SCENE 1
For the first scene, I decided to play around with the scale and position of the composition, in order to create a simple camera panning effect. To create the flickering lights, I simply added a glow effect and masked a small section of the Christmas tree. Next, I increased and decreased the glow intensity, key framing each movement and adjusting the timing to get the desired speed. I repeated this several times for the different parts of the tree, adjusting the key framing slightly each time, to make the lights appear as though they were flickering randomly.
For the log fire, I sourced a royalty free clip of a fire burning from online and positioned the footage to fit the gap in my constructed fireplace. I then feathered the edges to remove the harsh edges and added some smoke shadows. 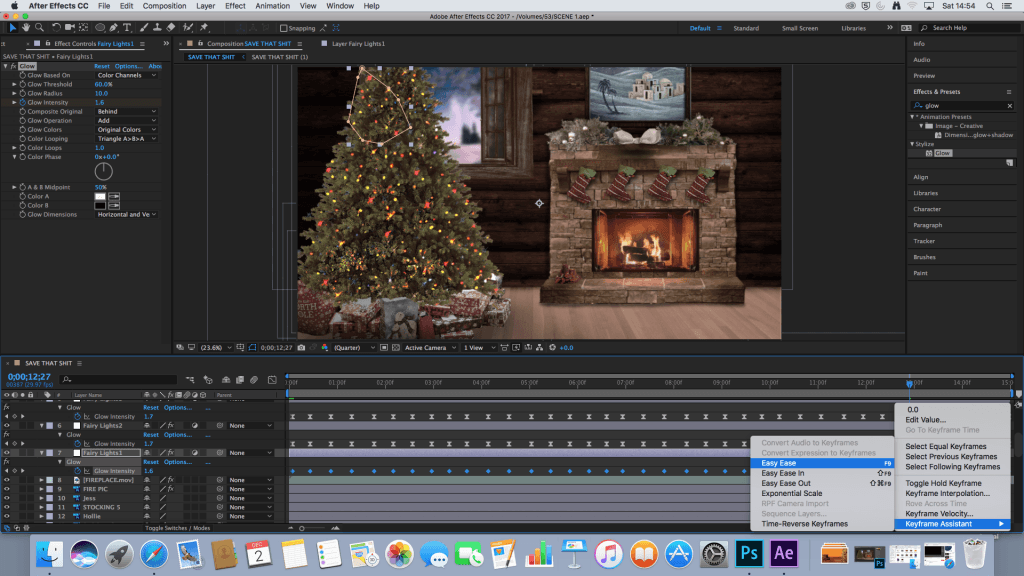
SCENE 2
Compared to the other two scenes, I wanted the toy shop window to be the busiest and have the most animated elements. I began by creating the rocking horse, which was just a case of key framing the rotation, after adjusting the anchor point to ensure the horse rocked from the bottom. To animate the plane flying across the scene, I needed to divide the plane body and propeller into separate layers, so I could key frame the propeller spinning round without affecting the whole plane. After doing this, I then linked the two layers so they travelled together in unison. When creating the toy train, I followed a similar process, diving the main body and individual wheels into separate layers, so I could animate the wheels rotating round.

Just like the flickering Christmas tree lights from the first scene, I key framed a subtle glow on the garland lights to add an extra festive element. Moreover, with all of the moving objects, I made sure that their shadows followed the same path and adjusted their scale or opacity when necessary to look more realistic.
SCENE 3
For the final composition, I wanted to create a snowy outdoor scene with a few subtle animations. Taking a basic silhouette of Santa on his sleigh, I key framed the position to have him fly past the moon. For the tree lights and garland, I applied the same glow effect just as I did for my previous scenes. I added a neon star light to the roof of the house, adjusting its skew and adding a soft glow around the edges. Finally, as with all of my scenes, I finished by applying a snow fall particle effect to the entire scene to create my snowy setting.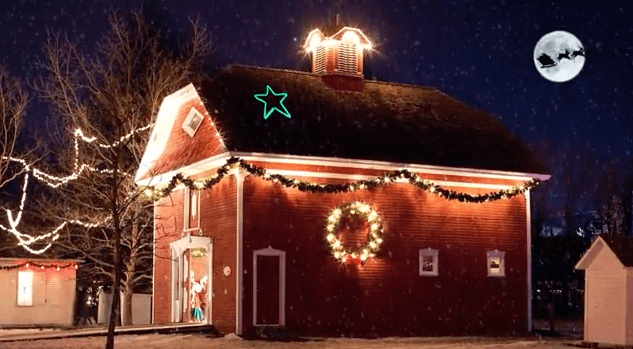
Bibliography
McKenzie, J. and Overturf, D. (2009). Artificial lighting for photography. 1st ed. Clifton Park, NY: Delmar Cengage Learning.